I have
recently done a photogravure workshop with the people from the
"Atelier
Estrela Brasil Oriente" here in São Paulo. It's not my
intention in anyway to provide a “complete guide” on photogravure
here as you can easily check everything about this amazing
19th technic over the web, particularly here
www.photogravure.com. This
is just my own way of documenting and recording what I did at this
great workshop at Sesc
Pompéia.
First
of all you need a copper plate slightly bigger the size you want your
image, they're not cheap and you'll spend a lot of time polishing in
order to make it “shine like a mirror”, so try getting one with
less damaging or scratches as possible or you'll might have to spend
a good hour polishing... here's my “before and after”.
After
cleaning, the plate is inserted in a box containing rosin for 2
minutes. Prior to that, the box must have a sort of mechanism to
agitate the rosin inside, making the grains float for a few seconds.
The time you wait the grains to sediment in the box is what will
define the size of the rosin grains needed for the process (in my
case 20 seconds).
 After
2 minutes, the plate is removed from the box and then taken straight
to the heating area to be fixed.
After
2 minutes, the plate is removed from the box and then taken straight
to the heating area to be fixed.
Once
it's fixed, the plate is ready to receive the gelatine previously
made light-sensitive with a 3.5% solution of
potassium bichromate at 15º and
dried for an hour at room temperature/50% humidity, the image
will be exposed under the UV light.
Making
a contact print with negative and the sensitized gelatine
 So
I had my digital positive in acetate adjusted in PS in order to get
the most in terms of tonal range. I then made the contact under the
UV light so I could get the image recorded on my gelatine. It's
always good to remember that you start with a positive image because
you're making the negative onto the copper plate.
So
I had my digital positive in acetate adjusted in PS in order to get
the most in terms of tonal range. I then made the contact under the
UV light so I could get the image recorded on my gelatine. It's
always good to remember that you start with a positive image because
you're making the negative onto the copper plate.
Receiving
2.30'' of UV light.
After
exposing it, you'll need to place the gelatine onto the plate with
the desired position, you should do this by immersing first the plate
in a tray with water at 15º, and then the gelatine. Start guiding in
the position wanted gently with your hands until the sheet adheres to
the plate, this process should take five minutes. Use a squeegee to
get rid off the water excess and finish by pressing with a cloth
making sure no bubbles has been created. Leave again to dry for
20 minutes with a piece of glass on top.

To
remove the paper base you should do this by giving several baths of
water at different temperatures,
starting
at 32º and then gradually move to a hotter mix (36º, 39º, 42º)
and with running water at 44º. You should keep it until no signs of
dichromate can be seen in the water, that means the gelatine is
getting soft again and the paper base will come off, the whole
process should take about 7-10 minutes. Once the paper base comes off
you will have to decrease the water temperature slowly until reaches
15º.
 Let the plate dry for a little while...
 What
happens from now is that the gelatine that got exposed under the UV
light is hardened onto the plate, what didn't get exposed will be
washed away during the acid bath. Before that you need to protect the
plate borders and back with a good masking tape and contact
paper. The reason you do that is that you can get a nice border on
your final print.
What
happens from now is that the gelatine that got exposed under the UV
light is hardened onto the plate, what didn't get exposed will be
washed away during the acid bath. Before that you need to protect the
plate borders and back with a good masking tape and contact
paper. The reason you do that is that you can get a nice border on
your final print.

Leave
it to dry for about eight hours so the gelatine can settle again to its
normal. The plate then is finally ready to go to the sequence
of acid baths.
The
acid used is Ferric Chloride and there are several baths that can be
use during this process in order to achieve better grey tones. Each
bottle of this has a different thickness of acid, which is measured
in Baumer (Bé) . So we start with deep blacks in 48º and 45º "Bé",
we then move to 43º, 41º and 39º Bé for the greys and mid tones
and lastly (depending upon your image), 37º Bé for the highlights.
Something I'd suggest is to have a copy of the image you're recording
next to you, in that way you can check the progress on your plate and make the decison accordingly.
The
numbers below shows the approximately time spent in each bath, it
obviously depends on the image you have (highlights or deep shadows).
You'll see the image appearing on the plate as the acid starts to
work, which is a good way of deciding the amount of time you will
spend in each bath.
-
48º / 1 minute 30 seconds
-
45º / 6 minutes
-
43º / 6 minutes
-
41º / 5 minutes
-
39º / 6 minutes 30 seconds
-
37º / 4 minutes 50 seconds
Once
the plate is recorded is time to get the whole masking tape with
alcohol and finishing with salt and vinegar to degrease the plate.
With
the recorded plate dried, is time to put some printing ink on and
do a test.
Clean
the excess of ink with a soft cloth and you'll start seeing the image
you'll get on the paper...
Put
a slightly wet paper on the top of the plate (this paper should be left in the sink with warm water for at least half an hour) and pass through the
machine...
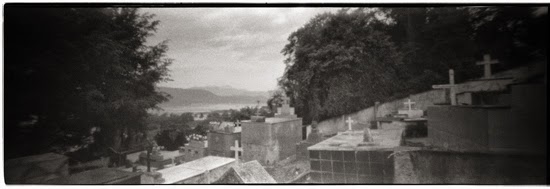
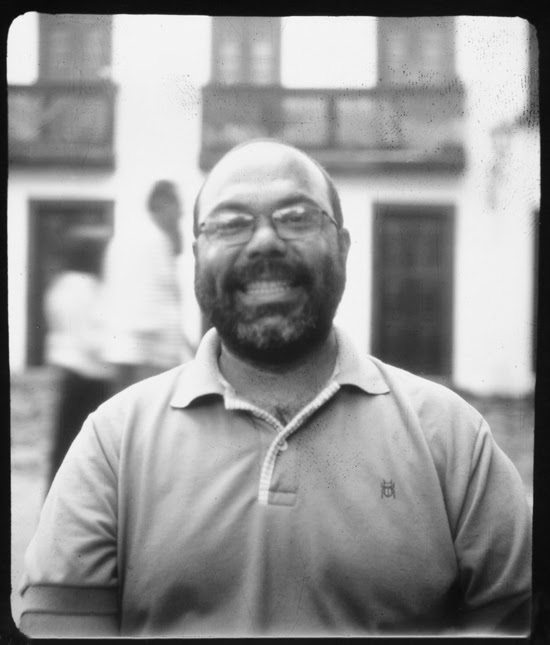
And finally, the results!!
Original negative taken with an Holga camera.